


Wait—don’t run away! I promise, hemming jeans doesn’t have to end with broken needles and tears. Yes, you can do this!
Why Needles Break
The problem isn’t you—it’s physics. As your presser foot climbs up and over the thick seam, it tips too far, which makes the needle hit at the wrong angle. That’s when it bends or snaps. Keep the foot level, and the needle glides right through.
If you’ve ever sat at your machine, snapping one needle after another on those bulky denim side seams, you know the frustration (and the cost—needles aren’t cheap!). But here’s the good news: with one simple trick, you can get over that dreaded “hump” in the hem without breaking needles—or your sanity. 🙂
The Secret Tool
Nope, you don’t need a massive industrial machine (even my heavy-duty one still struggles on those seams). What you need is a little helper I like to call The Equalizer. It’s just a small piece you slide under the foot to even things out—and suddenly, sewing over those thick spots is a breeze.
You can buy a commercial version called a Hump Jumper or a Jean-a-ma-jig, but honestly, you can make your own in five minutes. Just cut a rectangle out of heavy box cardboard or sturdy plastic about 1/8” thick. That’s it.
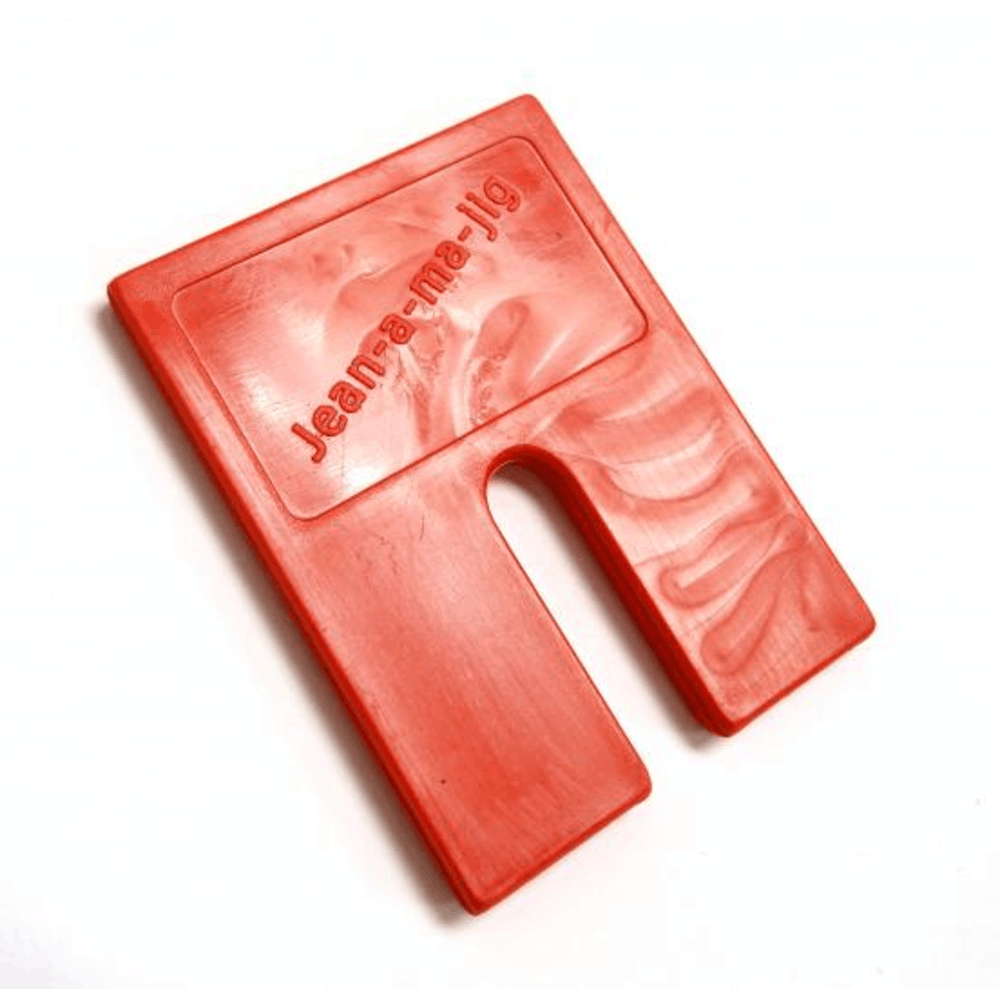
This picture shows the Equalizer my husband made for me yars ago out of heavy plastic. As you can see, it doesn’t have to be fancy or the edges perfect. It will do the job. The hole on the left side of the Equalizer is to hang it on my pegboard.

Making Your Own “Equalizer”
Cut the piece of cardboard or plastic roughly as shown below.

On to the hemming!
Materials:
- Jeans to hem
- Size 16/100 Denim, Sharp or Standard sewing machine needle
- Thread (preferably in a colour that matches existing top-stitching)
- The Equalizer
Instructions:
- Start stitching just after the side seam of the inside leg seam, stopping in the needle down position within a length of the presser foot of the outside side seam (up to, but not on or over the side seam).
Start stitching just after the inner, thicker side seam.
Stitch up to, but not over, the outer side seam.
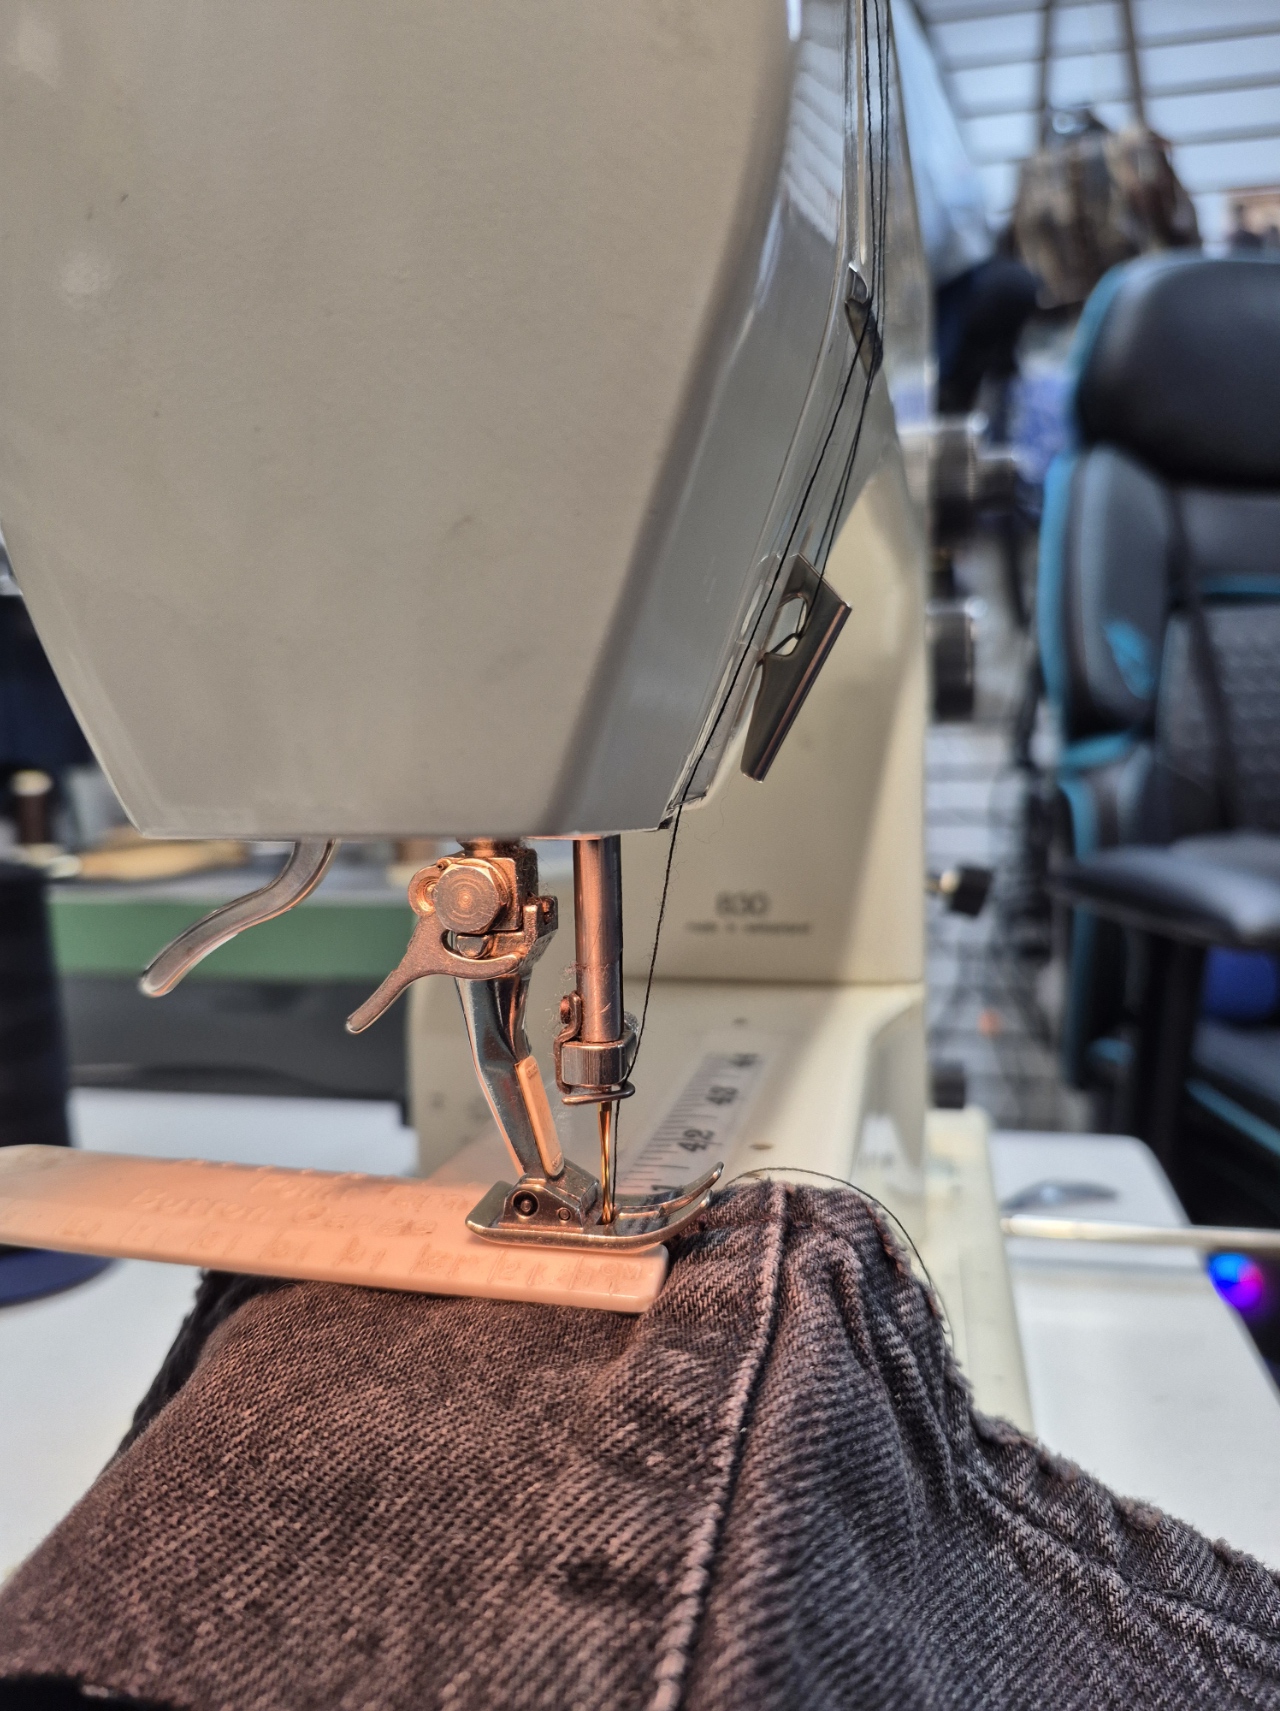
2. With the needle in the down position, lift the presser foot. Insert the Equalizer from the back, slit side facing forward, and position it snugly against—but not on top of—the thick side seam.
Equalizer under the presser foot before the side seam:

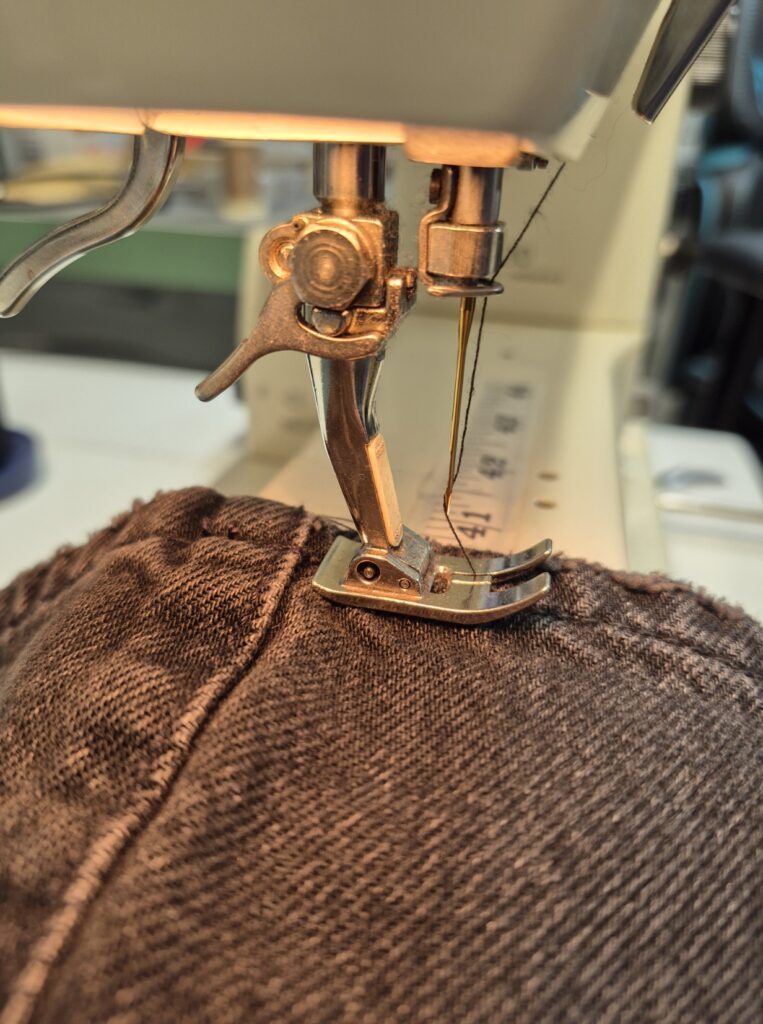
3. Lower the presser foot and stitch across, but not over the hump, until the presser foot rests firmly on the hump. End in the needle down position.
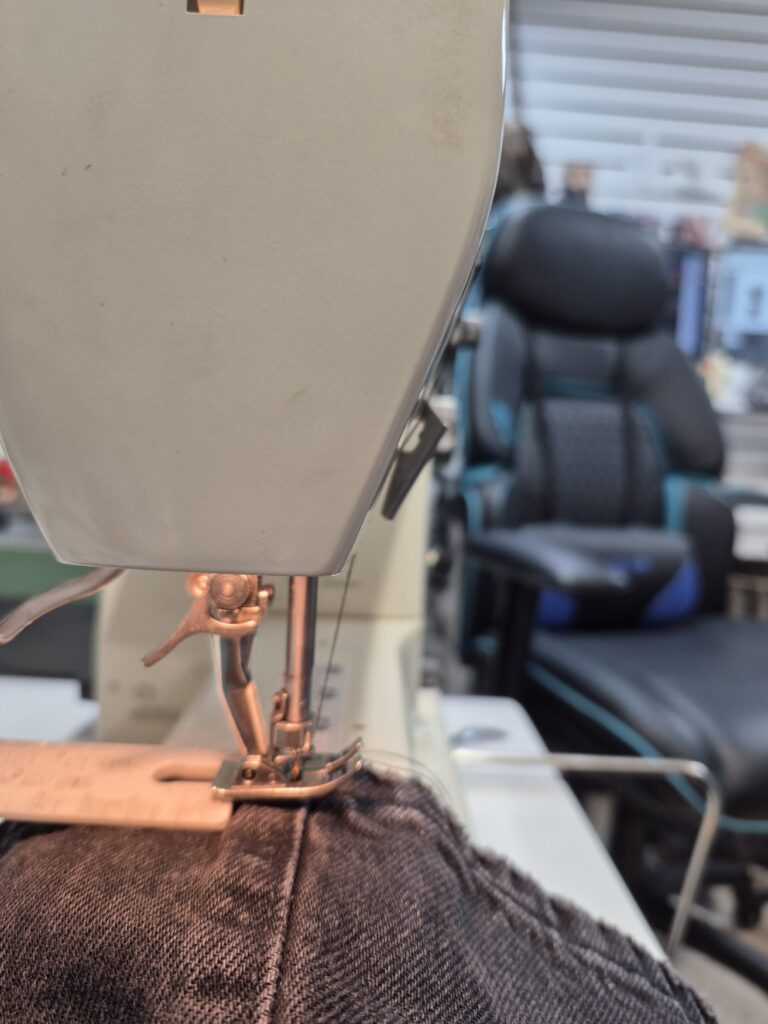
Presser foot sitting level on the side seam hump.
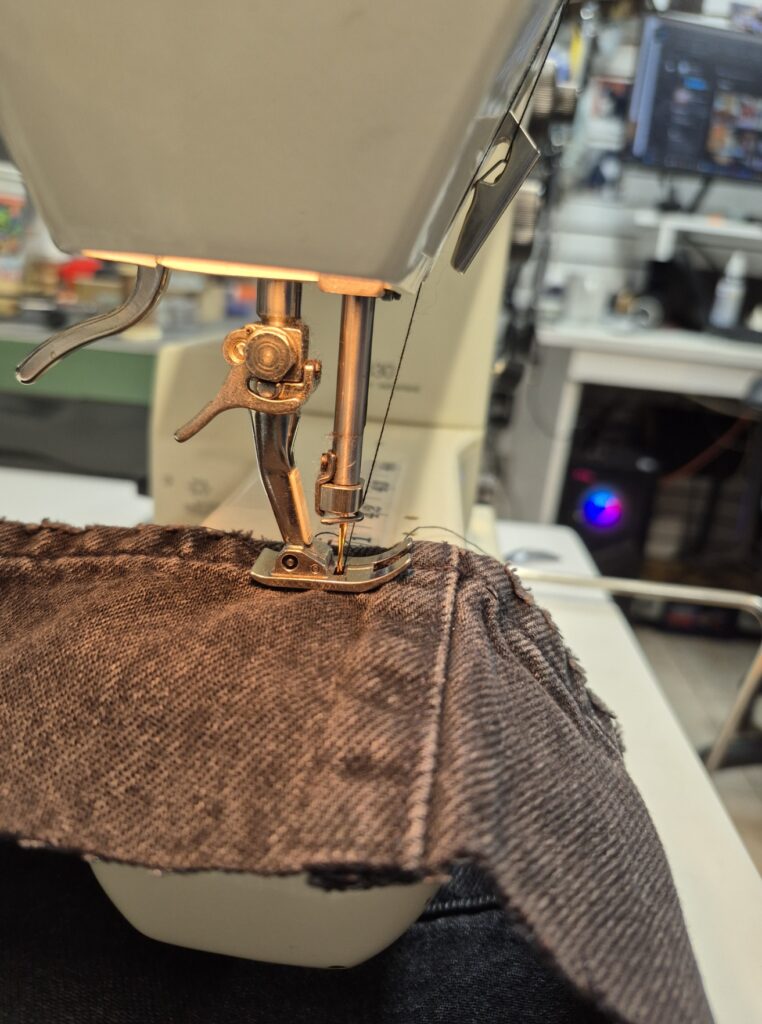
4. With the needle in the down position, remove the Equalizer and place it in front of the presser foot, this time with the slit facing backward. Position it so the presser foot will step onto the Equalizer, with the needle stitching in the slit.
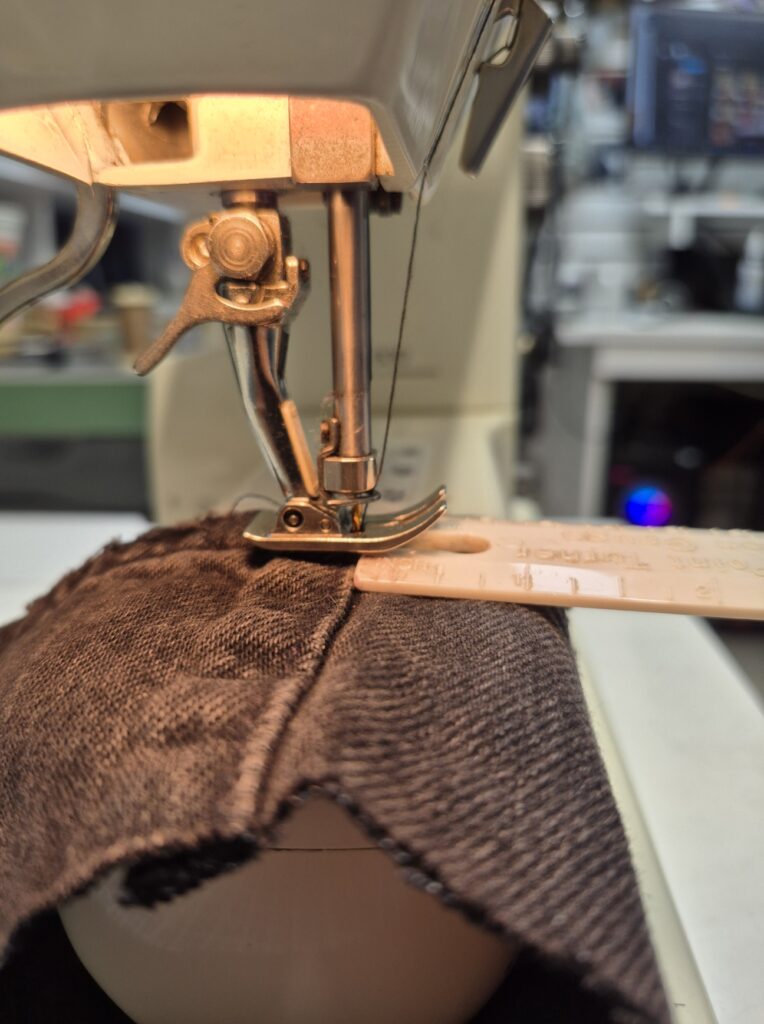
Equalizer in front of the side seam, about to sew off the hump onto the thinner area.
5. Continue sewing until the presser foot has completely gone over the hump. With the needle in the down position, lift the presser foot and remove the Equalizer.
Completely off the hump.
6. Continue to sew until the stitches run into the initial stitches by about 1/2″ to 1 inch.
You’re done!
Closing Note
I hope you’ve enjoyed this tutorial.
Please let me know if anything is unclear or if there are other tutorials you’d like me to cover. I’d also love to hear your stories of how you’ve conquered the jean hem—or any other thoughts you’d like to share.
Leave a Reply